
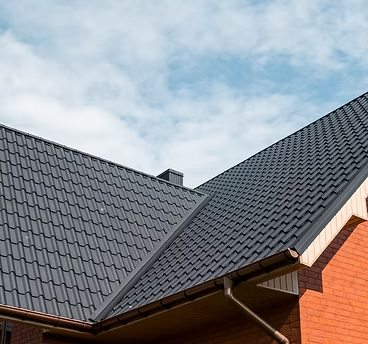
Ask any Calgary roofer to name the most common source of leak calls and you’ll hear the same answer: chimneys. Chimney flashing is the most technically demanding flashing work on a residential roof, and it’s also the work most often done badly during original construction. The combination produces a steady stream of homeowners discovering water stains on bedroom ceilings, blaming the roof, and getting quotes that range from $400 to $4,000 depending on whether the contractor understands the underlying problem.
This article explains why chimneys leak, what proper step flashing actually looks like, and what to ask when a roofer arrives to fix it. The information matters because the cheap fix — fresh caulking around the existing flashing — almost never holds for more than a season or two. The right fix lasts the life of the chimney.
Why chimneys leak more than anything else on a roof
A chimney is a vertical structure that penetrates the roof at right angles to its slope, creating four distinct flashing zones — the front (downslope) side, the two sides parallel to the slope, and the back (upslope) side. Each zone has a different geometry, different water flow patterns, and different flashing requirements.
Water from the upslope side of the roof has to be diverted around the chimney without entering the gap between the chimney and the roof. Water that runs along the chimney sides has to be channeled out without backflow. And water from the downslope side has to be prevented from wicking up under the shingles by capillary action and wind pressure.
Proper chimney flashing handles all three flows with a system of interlocking metal components — step flashing on the sides, head flashing across the upslope side, apron flashing across the downslope side, and counter-flashing that caps the entire assembly and locks into the chimney masonry. Each component does specific work. Skipping or improvising any of them creates a leak path.
Brick chimneys are particularly demanding because they expand and contract differently from wood framing, and they shift slightly over decades of freeze-thaw cycles. Flashing has to accommodate this differential movement without breaking the watertight seal.
The common installation errors
The errors that produce most chimney leaks in Calgary homes are surprisingly consistent.
- Missing or undersized step flashing. Some installations use a single piece of L-flashing along each side of the chimney rather than individual stepped pieces interleaved with each shingle course. The L-flashing approach fails within 5 to 10 years.
- No counter-flashing into the masonry. Counter-flashing should be cut into a mortar joint above the step flashing and caulked or sealed in place. Many installations skip this step entirely, leaving the step flashing exposed and unprotected at its top edge.
- Caulk-only sealing. Roofing caulk applied to the chimney-shingle joint without any underlying metal flashing is purely cosmetic. The caulk holds water out for one or two summers and then fails as the differential movement breaks the bond.
- No cricket on wide chimneys. Chimneys wider than 30 inches on the upslope dimension need a small wooden saddle (cricket) that diverts water around the chimney rather than letting it pile up against the upslope wall. Without a cricket, snow load creates ice dams against the chimney every winter.
- Improper masonry condition. Deteriorated mortar joints provide no anchoring surface for counter-flashing, and water enters the chimney through the mortar even if the flashing itself is correct.
Any one of these errors alone can produce intermittent leaks. Combinations produce chronic problems that resist diagnosis because the leak path involves multiple failure points.
How step flashing actually works
Step flashing is a series of individual L-shaped metal pieces — typically 5 by 7 inches in 26-gauge galvanized steel or aluminum — installed one piece per shingle course along the sides of the chimney.
Each piece bends 90 degrees, with one leg lying flat on the roof deck under the shingle course and the other leg standing vertically against the chimney face. The bottom edge of the flat leg overlaps the shingle below; the top edge gets covered by the shingle above. The vertical leg rises against the chimney to a height of at least 4 inches.
Counter-flashing then caps the vertical legs. The counter-flashing is a separate piece of metal cut into a horizontal groove in the chimney mortar (a reglet) and folded down to cover the step-flashing vertical legs. The reglet is sealed with sealant designed for masonry-to-metal joints.
The result is a layered, redundant system where any water that gets past the counter-flashing meets the step flashing below, and any water that gets past the step flashing meets the shingle course below that. The system holds water out reliably for decades.
Diagnosing whether your chimney needs repair or replacement
Three diagnostic signs indicate the existing chimney flashing has reached end of life rather than just needing a touch-up.
Recurring interior staining on ceilings near the chimney, particularly after wind-driven rain or rapid snowmelt. A single stain after one extreme event may be a one-time situation; recurring stains indicate systemic flashing failure.
Visible gaps or daylight when inspecting the chimney-roof intersection from above. A proper flashing assembly has no visible gaps anywhere along its perimeter. Visible separation between the counter-flashing and the masonry is a defining symptom of failure.
Crumbling mortar joints on the chimney itself, especially in the joints where counter-flashing is mounted or should be mounted. Chimney repointing (replacing the mortar in selected joints) often needs to happen before or alongside flashing replacement.
What a proper repair costs in Calgary
A complete chimney flashing replacement on a typical Calgary residential chimney runs $1,500 to $3,500 depending on chimney size, accessibility, masonry condition, and whether a cricket is required. Repointing of deteriorated mortar joints adds another $400 to $1,200.
This pricing assumes complete demolition of the existing flashing assembly, masonry preparation (cutting new reglets if needed, repointing if needed), installation of new step flashing interleaved with the existing or new shingles, head flashing with cricket if applicable, apron flashing on the downslope side, and full counter-flashing with masonry-compatible sealants.
The temptation to accept a $400 ‘fresh caulking’ quote from a contractor knocking on the door after a leak event is real, particularly when the homeowner has just discovered the ceiling stain. The math doesn’t favour the cheap fix. Caulking that fails in 18 months and produces another interior repair costs more in cumulative damage than the comprehensive repair would have cost in year one.
Coordinating with roof replacement
If the home is approaching roof replacement anyway, chimney flashing rework should always be part of the same project. The roof being off is the cheapest moment to do the flashing work correctly. New step flashing interleaves naturally with the new shingles, and the contractor is already on the roof with the right tools.
Roofing contractors quoting a replacement should include chimney flashing in the scope unless explicitly excluded. If a quote doesn’t mention chimney flashing, ask why. The answer is sometimes legitimate (the existing flashing is documented to be in good condition) but more often indicates the contractor is planning to reuse existing flashing components — which compromises the project.
An experienced Calgary roofing crew will inspect every chimney as part of the quoting process and identify whether the existing flashing is reusable, repairable, or needs full replacement. The conversation should happen before the contract is signed, not after the tear-off reveals problems.
When the chimney itself is the problem
Sometimes the underlying issue isn’t the flashing — it’s the chimney. Old brick chimneys with cracked masonry, separated crown caps, or significant freeze-thaw damage will leak water through the chimney structure itself, bypassing even perfect flashing.
A chimney crown (the concrete cap at the top of the chimney) that has cracked or eroded is a common Calgary issue. Water enters through the crack, travels down through the masonry, and emerges as ceiling staining inside the house. The flashing isn’t the problem; the chimney is.
Chimney crown replacement is a masonry trade rather than a roofing trade. A roofing contractor finding a failed crown during chimney flashing work will refer the masonry to a specialist. Coordinating both trades on the same week is straightforward and avoids redoing work later.
Stop the chimney leak permanently
Chimney flashing is one of those areas where the cheap fix and the right fix are different fixes. Caulk is for finishing details, not for primary waterproofing. The flashing system that holds water out for 40 years is a system of interlocked metal components installed with attention to the specific geometry of each chimney.
When the next leak shows up, ask the contractor to walk you through the existing flashing assembly and describe what they would change. The answer tells you whether you’re talking to someone who understands the work or someone selling caulking. The first option costs more upfront and ends the conversation; the second option starts a conversation that recurs every two summers.
About the author — this article was contributed by Angel’s Roofing, a Calgary roofing contractor experienced in chimney flashing repair and replacement. The company coordinates with masonry trades when chimney structural work is needed, and integrates flashing renewal into roof replacement projects across the city.


